Helpful Pro Tips For DIY/Homeowners
Hi Everyone ,
With my years of experience I am willing to share some insightful tips to help you as a DIY/Homeowner with your next project or current project underway. Some things to consider is prep, which is very important in the painting industry. Under the preparation category of painting is first off , assessing the room you are working with ie: walls, ceilings, or trim/doors.
First off look at the walls is there any cracks or gouges or scrapes that need repairing . What I do is take some plaster or premix spackle in a tub, and smoothly apply on the damaged area , not to thick. If you need to apply another coat on the hole or gouge, your better off doing two thin coats , so that it is easier to sand . The idea is t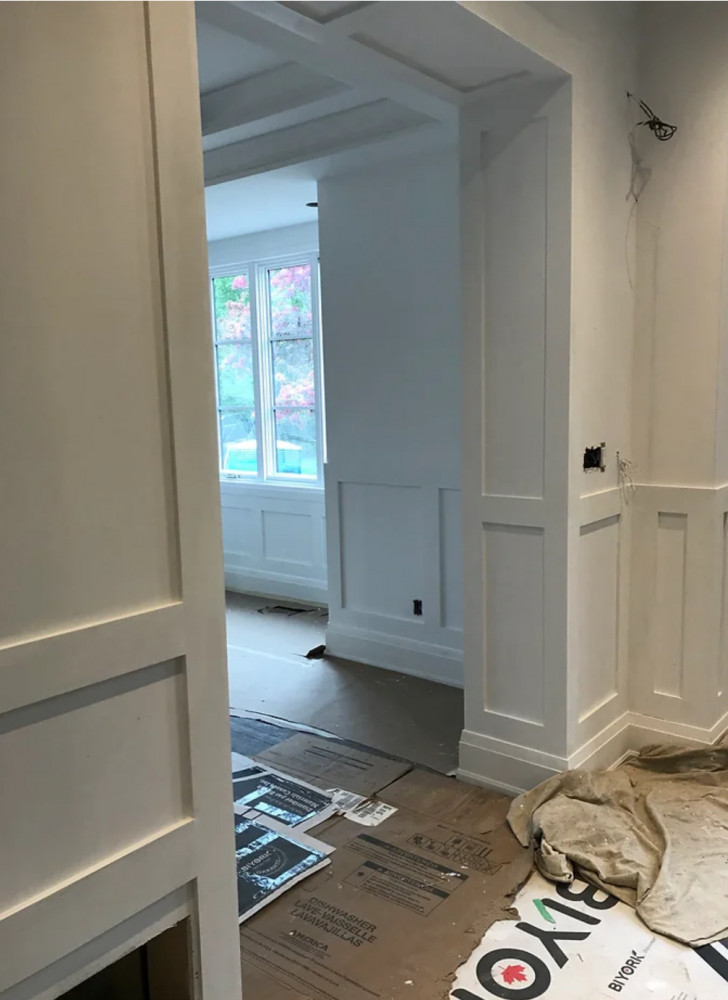 o not create extra work for yourself. It should not be a task to sand unnecessarily heavy patches, just two smooth coats, and let it dry properly. Then once its dried then what you want to do is use a white primer perferably a Benjamin Moore product, their primer is called Step one . Lightly sand your patches then brush on the primer. This will cover the patch and not burn through once you apply the final coat. This Primer is resonably priced primer paint, also has better coverage than other brands from other stores,and that’s from my personal experience. Don’t think that Benjamin Moore paint products are expensive they are not, in comparison to other brands it’s very competitive. It is very accessable to buy at any local Benjamin Moore retail dealer. Also the quality is key when using their brand of paint, it makes the project that much easier. Which means the coverage of any colour you use it will take two coats to make your room or space fabulous.
Next is looking at trim which is casing or frames around your doorway or window areas to identify. Usually if it hasn’t been painted in a while or never looked after , sometimes there is a hair line crack along those frames or even on baseboards. Sometimes it’s a small opening or large opening depending on how the house settles. To close those cracks you will use a paintable caulking , they come in a small white tube called Dap white caulking. That particular brand has two sizes , a small hand held tube and a large tube which you need a caulking gun to put into it to use. By doing these simple preparation steps it will automatically look that much better and more professional when you begin to paint. As seen in this picture, the wainscotting there show no visible hair line cracks. Once it is painted it will give a nice clean look. People will think you hired a professional that did the work.
Walls next is to lightly sand walls before painting of the first coat. This will take any roughness out , or suface dust off from the wall. There is a tool you can buy which is called a pole sander that attaches to a pole so that it is easier to sand walls with. Usually I use a120 grit sandpaper that goes onto the pole sander. Making the job much easier to do. Also with the same pole you can use it to attach a rollergauge and sleeve to when rolling walls with paint. I know I’ve seen it time and time again rolling walls without a pole, people working to hard unnecessarily up and down the walls. This is why most people say “Oh my gosh painting is to hard and back breaking”. Sure because too much energy is being put into it, when you don’t have the right tools. Like any job , to do it properly you need to have the proper tools to get it done in half the time with ease. What’s the saying “work smarter not harder”.
Feel free to reach out if you need any clarification on anything or if you need more in depth insight. I’ll be happy to answer any of your questions . Email me at yorkpaintingroup@gmail.com or call 416-302-2069 Domenic (York Painting Group).