DIY HOME IMPROVEMENTS
Hello Everyone ,
So most people now a days are getting a lot of information about Home Improvements on Youtube or just plain Googling their information. Instead I’m offering my expertise and experience in this area , I”ll be giving an in depth look at Drywall taping tips , also give a brief look at the proper Drywall Taping Tools , Drywall taping compound. I will also touch on Drywall Tape repair. As being a painting contractor, sometimes I need to do the repairs myself because you don’t want to call a plaster/drywall person for such a small job. Sometimes I take care of it to save time and money, and keep the job moving. So Let’s get right into it shall we !!!
Drywall Taping Tips
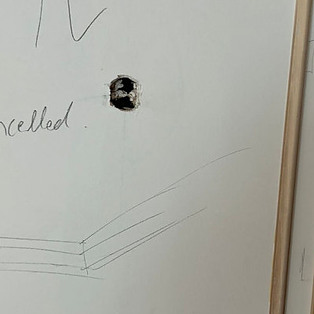
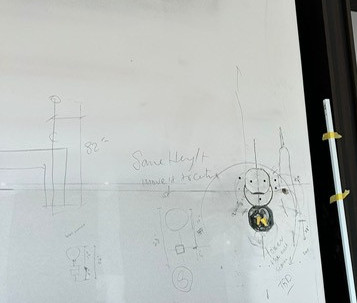
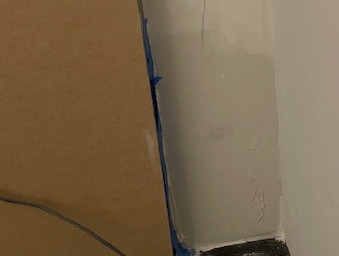
In this Section I will go over some best ways to tackle these projects if your interested in Do It Yourself projects. I will show some various pictures on different scenarios for Drywall repair areas that can possibly arise in your home when doing a Renovation or New Build or you may possibly find when doing an addition to your home. They are just simple hole repairs and some small missing Drywall pieces. Below is a picture of a hole that needs to be filled , so we can take care of this two ways as a DIY person you can vary simply use a Mesh Tape or Drywall Paper tape. Both of these ways to cover this hole is easy to use and more accessible for you DIYers. Unless your savvy enough and have some Drywall pieces laying around you can use that too. Which I’ll go more in depth later on when using small Drywall Pieces. For now let’s go with covering this with Paper Tape or Mesh Tape. So usually what I do is mix some Sheetrock 45 which is a powder mix, you take some powder in a bucket and add some water. The consistency should be not to runny but its best to add a little water each time. So that you see the powder start to clump then you can add more water to make it smooh. As you mix this Sheetrock 45 with a scrapper so that when you mix it in and add the water then you smooth it out with the scrappers and you are ready to pick it up just enough to fill the scrappers. So before puttting the mesh tape on I fill the hole with the Sheetrock so that when applying the mesh tape over the area it will stick nicely and you can smooth it out with the plaster. Once you apply the first coat then let it dry and apply another two thin coats of plaster to cover the area , smooth it out making the area blend with the existing wall. Both of these examples are areas where you would use the Mesh Tape and Paper Tape to cover the area , also its for keeping it from cracking and splitting the plaster.
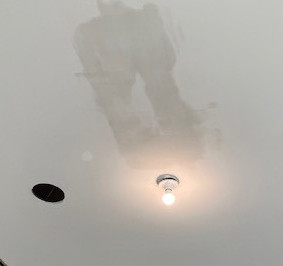
I have gone ahead a gave a first coat of plaster in the next picture you are about to see. In this picture I had to insert a small piece of drywall , how I did that is called a California Patch. Where you measure the small area , cut around the drywall piece but leaving the paper of the drywall still attached to the piece. This will allow you to insert it into the hole or area where you want to fill it in but the paper around will hold the piece without having to use drywall screws or a piece of wood to hold. Then you can apply your plaster nicely and evenly around covering the paper. Then let it dry and repeat the process two more times to give it a nice surface and you never know that a repair was ever done. By the time you do this a few times you will become an expert plaster repair person.
Picture 1 and Picture 2 show the repair was done but then I repeated the process two more times with plaster. But the other two coats I used was a ready mix plaster in a plastic container from CGC compound which you can find at Home Depot or any other supplier who carries these products. I use the last two coats with this product because its very easy to sand between coats, giving a nice smooth finish.
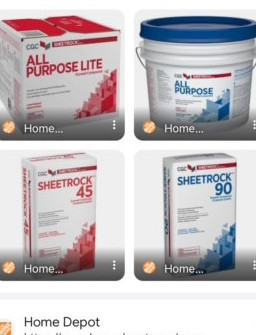
This picture shows the products I use in the powder form which is the sheetrock 45 and 90 for the first coat. Then the two products above the others are the easy sandable plaster which I use for the second and third coats. I perfer the container one because it keeps the plaster nice a clean every time you open it to use. The All Purpose Lite in the box can be a bit messy because inside it has a plastic membrane where the plaster is in. Every time you open the bag it can flake and get messy and clumpy. Unless you empty the plastic with the contents into a bucket then its okay. But I prefer the container because they sell different sizes which is great. You can choose which ever size that meets your project needs so there is no waste. Once you use it enough you’ll see that its great to use it all up and if you have some leftover you can just close the lid , ready to use it again at a later time.
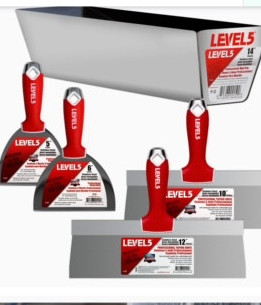
The proper tools to use for these plaster repair work is scrappers which I will show you a picture of below. These are the putty scrappers I use for my plastering jobs. The one smaller and medium ones are the ones i use mostly for small patches and repairs. When you get into larger plastering jobs then you need the larger scrappers to be able to spread plaster widely on larger areas like when you do new Drywall for a room or basement renovations and so on…. Now the metal trough holder thing I don’t use but some people use it to fill it with plaster and carry it when doing the work in different areas of the house. Some people like to sccop it out with their scrappers , just to keep the plaster more contained because it can be at times runny and you can drop it with any notice , can be messy at times. It’s best to be clean and neat when working with this type of plaster which is the ( ready mix one in the container). Some people work messy and drop it everywhere then you have to clean it right away cause you can easily track it all over the place, trust me I’ve seen it all. Especially in new construction builds where there is no floor can track it everywhere, step in it by accident , and make a mess.
Conclusion
So to wrap up this part of the DIY Drywall Repair segment I hope you found value with this information . I will be doing more of these types of posts to help anyone who is willing to either learn about the tricks of the trade or just use this information for themselves on their next project. I enjoy giving informative knowledge and experience that I’ve had on my projects to give to others. Hope this gives a better sense of what to do when you encounter these types of repairs and want to tackle it for yourself. Practise makes perfect , no one is an expert over night but with a little guidance and direction from professionals like myself. If anyone needs more explanation or have any other questions feel free to reach out to me . Email : yorkpaintingroup@gmail.com or call 416-302-2069 I’d be happy to hear from you . Until next time !!